Connecting to the CNC - USB
Overview
In order to use the CNC we first need to hook up to it.
At a later stage we may have a separate rpi setup to handle the milling,
but for now you will need to use your own laptop with a USB Connection to run the milling software.
If using Windows 10 then I’d recommend using a separate desktop window, and using a browser other than your main one (such as Firefox or chrome) so that you can continue to do other things (such as browser the web) with your main browser etc. without interfering with the milling process.
Try to avoid using the Microsoft Edge Browser as an alternate browser, it seems to be okay sending commands to the mill, but I’ve noticed the controls become locked up / unresponsive during the process of sending G-Code / doing the actual mill.
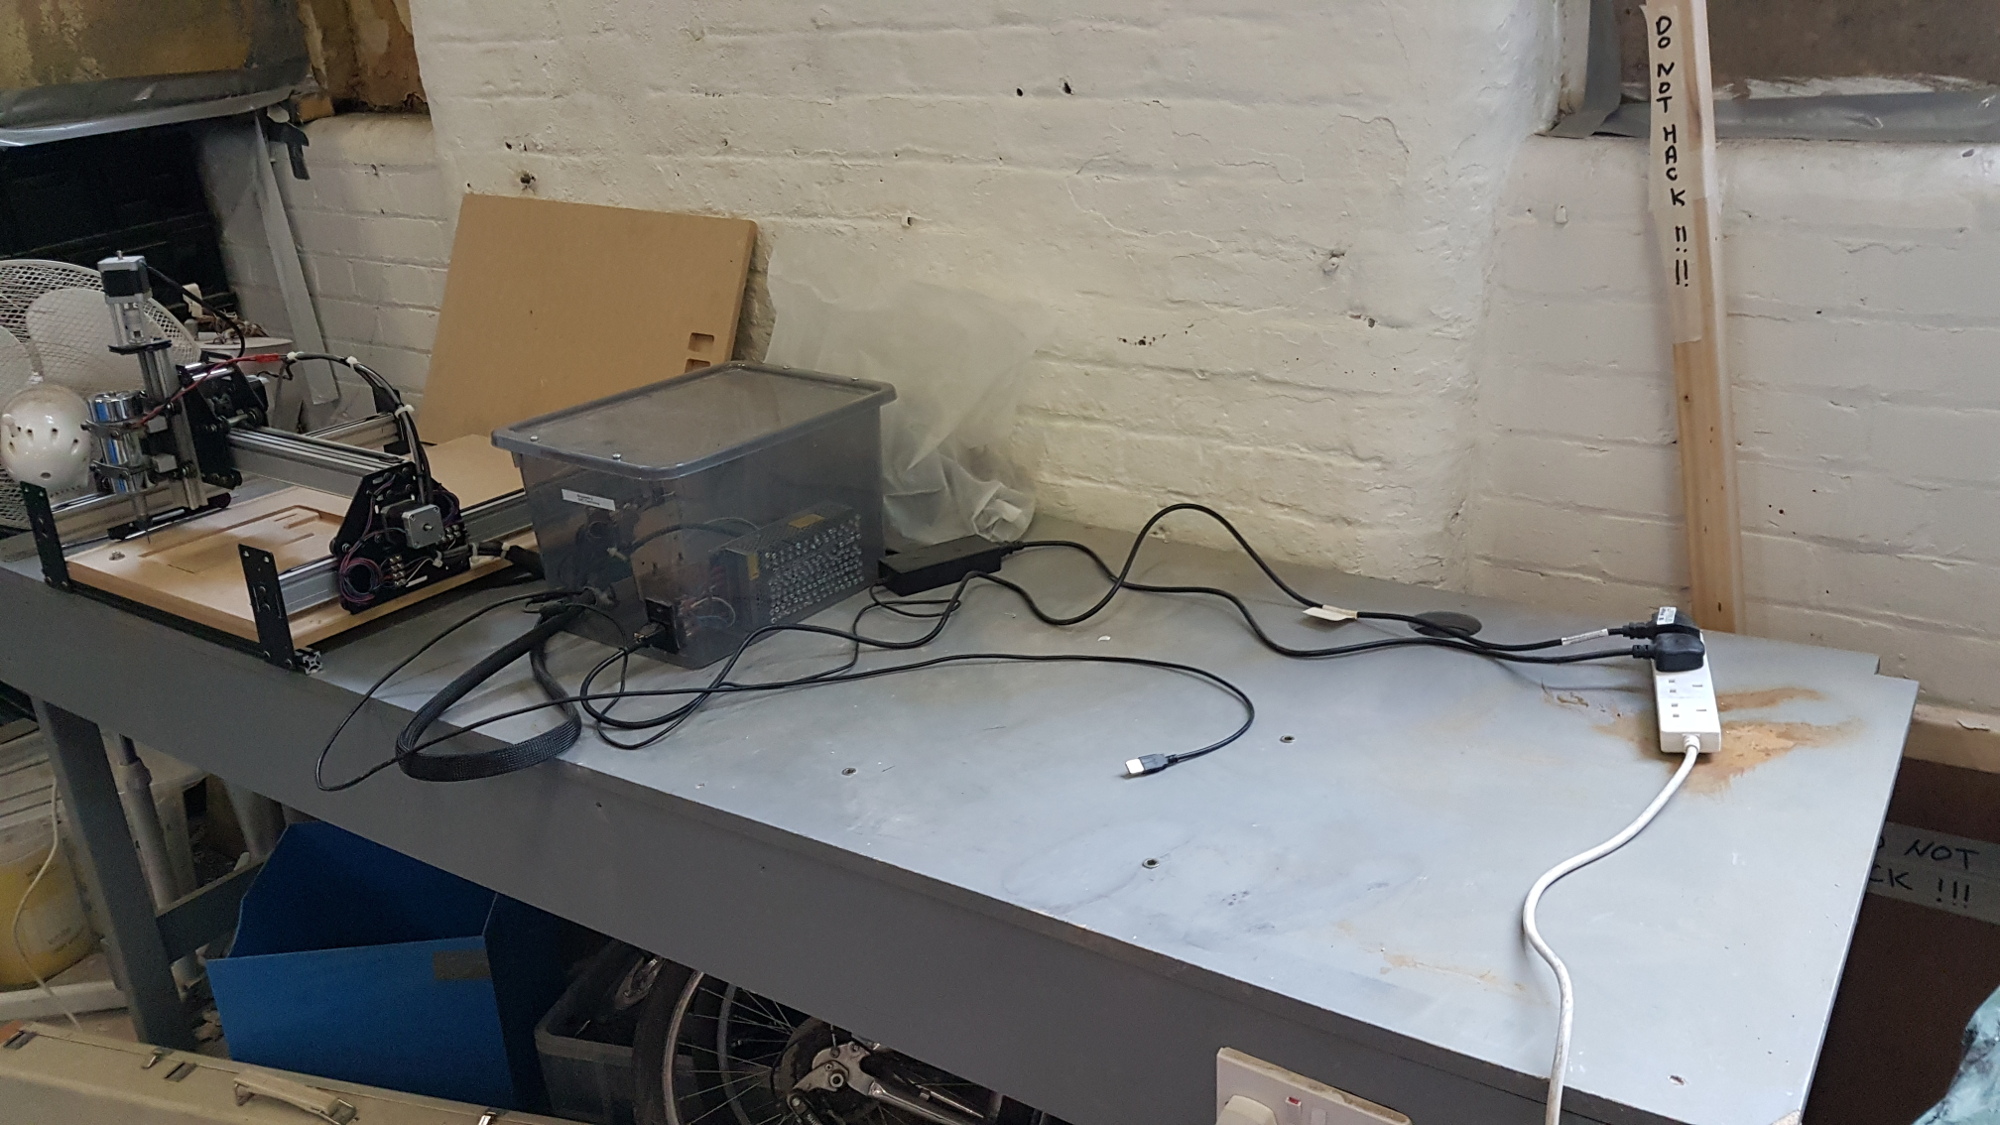
Plugging In
There’s currently two main’s plugs that need to be plugged in
- One powers the CNC Grbl board and fan
- The second powers a 12V supply which feeds the Spindle.
You may need to switch on the electronics bench, as we’ve got the bench it’s on temporarily hooked up to that at the moment. Connect the USB plug into your laptop.
Controls
Spindle Power
The switch on the front of the box controls the spindle on / off
The speed of the spindle is fixed at the moment; I think the spindle is 48V but we’re currently using a 12V Power Supply so the speed is only quarter of maximum.
Note this switch only controls the power to the spindle, not the grbl shield or the arduino, they are powered by a seperate supply not controlled by this switch

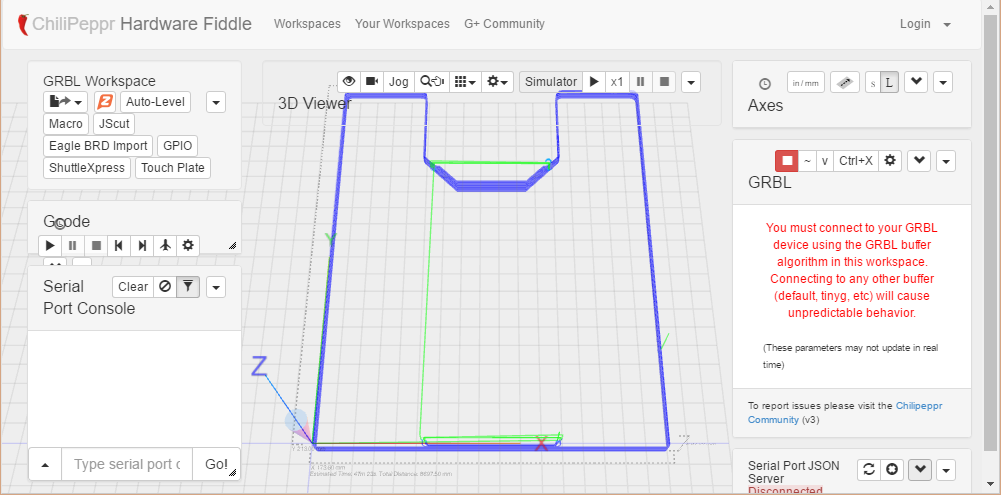
Starting Chillipepr
Next we’re going to start up Chillipepr.
- Open up a 2nd browser window
- Browse to http://chilipeppr.com/grbl
Chillipepr is a online system consisting of a series of web pages and JavaScript scripts pulled in from other sites. There has been an attempt to create an offline version, but for now it’s easier just to browse the online version. The JavaScript within Chillipepr will connect to a Serial Port Json Server ether located on your local machine or elsewhere.
I’ve discovered that it’s best to run Chillipepr and the serial server on the same machine to avoid problems with latency. We’re using the Grbl version of Chillipepr here as the firmware for the shapeoko2 is the latest version of Grbl.
Starting the Serial Port Json Server
Next we need to start a small app on our local machine called the Serial Port Json Server. The serial server acts as a bridge in-between the serial port on your local machine which connects to the mill and Chillipepr.
Downloading the Serial Proxy
You can find the download links in the bottom right hand corner of the Chillipepr window. Sometimes you need to press the up / down arrow to expand the tab to see it, then scroll down.

There should be different versions listed for different operating systems.
Running the Serial Port Json Server
First plug in the USB plug from the mill. Then run the serial port json server, it should pick up on the new serial port and list it in a console window

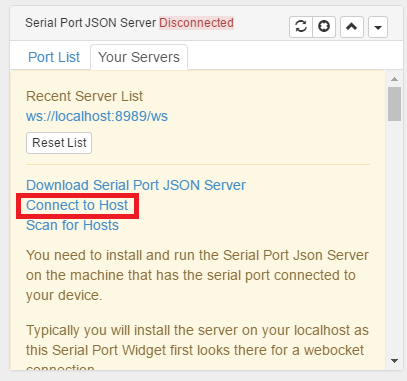
Connecting Chillipepr to the Serial Proxy
Next we should be ready to now link / connect Chillipepr to the serial server.
Select Connect to Host
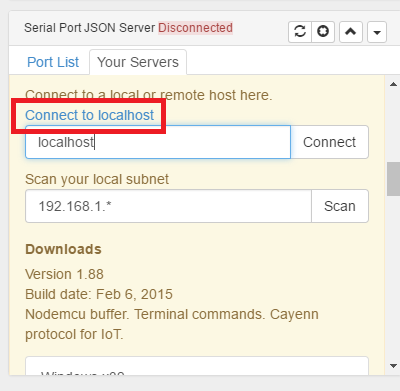
Select Connect to Localhost
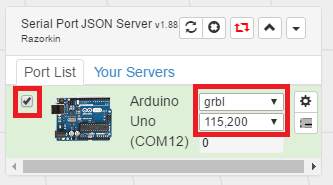
We should now see a list of the devices detected in the bottom right corner.
In the drop down lists make sure Grbl is selected, and the maximum baud rate 115,200
The older versions of Grbl used to use a slower baud rate of around 9600, but the later versions use the max 115,200 speed instead.
Once you’ve selected Grbl in the drop down, click the tick box on the left to initiate the connection to the board.
Connecting via Putty
If you want to instead connect to the CNC via a Serial Console, then you can use Putty to do this
-
Download and install Putty from http://www.chiark.greenend.org.uk/~sgtatham/putty/download.html
-
Open putty and connect to the Grbl / Arduino Uno’s COM Port
- Speed: 115200
- Databits: 8
- StopBits: 1
- Parity / Flow Control: None
- http://www.shapeoko.com/wiki/index.php/G-Code